
Lacing 40 spoke wheels – z1,z900/z1000
This tutorial is on how to lace a Kawasaki z1000 spoked wheel it is applicable to most if not all the Kawasaki series z1/z900/z650 wheels and the process pretty much applies to most road bikes with spoked wheels, keep in mind the hole count may vary and the cross over pattern might be different on other models.
The Kawasaki z1000A1 and z1000A2 models feature a rear disk mounted to a different hub to the earlier drum brake models. The disk hub features 40 spokes in total, like the earlier models but 20 spokes are <TODO-MEASURE)mm in length while the remaining 20 spokes are <TODO-MEASURE>mm in length. Also note that the shorter spokes are 2 distinct styles with slightly different bends in them, so the side they orient on is critical but easy to determine as they will not point in to the centre of the rim if you poke them into the wrong whole.

On the kit supplied for the z1000 the short spokes are have different bends. One is the “inner” spoke and the other the “outer” spoke. The “outer” spoke has a 90 degree bend.
A 1976 z900-A4 also has 40 spokes, all the same length (<TODO-MEASURE>mm). In fact most Drum Brake hubs have equal length spokes. I have also discovered the z650B models have the same front wheel as the z900-A4 but the rear wheel has a different sized drum so the spoke set is different to the z900-A4.

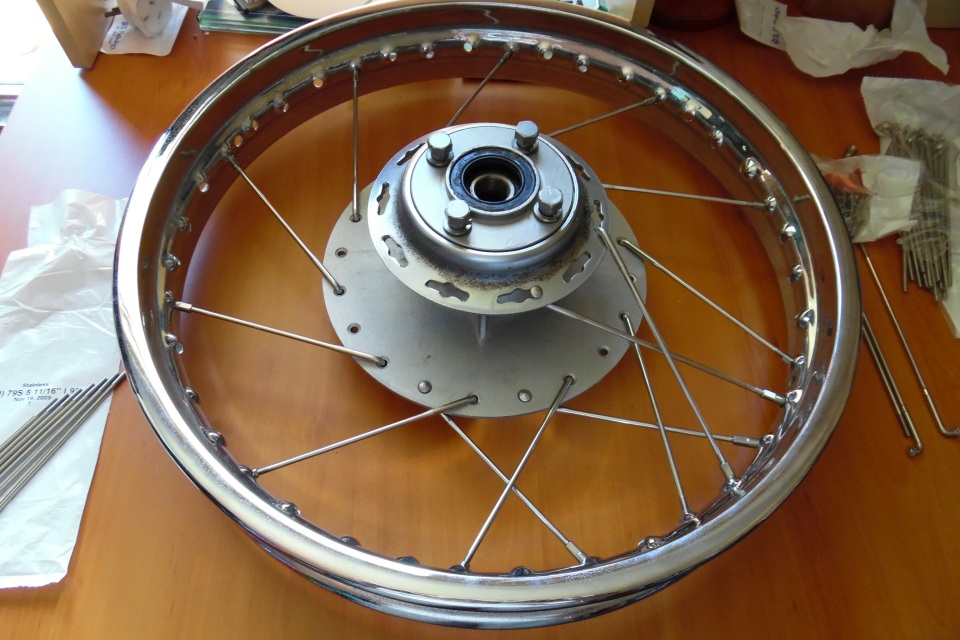
Prior to restoration the old rim was rusted and in need of re-chroming. While the hub needed the alloy professionally cleaned.
On the z1000 (and most “z” series bikes), the lacing is done so that 10 spokes are laced per edge. There are 4 edges, 2 on the chain side and 2 on the disk side. Each side has an “outer” edge and an “inner” edge.
On the Rim there are ridges that match the orientation for the spoke so the nipple seats evenly in the rim, if you poke a nipple into any hole you will quickly see the direction it points, the holes are in pairs and each pair points to a side of the Hub while the next two holes point to the other side but in the opposite direction. This is typical of most Japanese motorcycles but there are always exceptions to the rule!

This spoke set for the z1000 has 3 different spokes (2 short and 1 long) and a pack of 41 nipples. Also supplied is a small amount of thick lube to use on the threads. Shown are just the short length spokes.
To lace the spokes in, separate the spokes into 3 groups, each group has the same size spokes, so 2 short groups and 1 long group in the case of the z1000. On a drum brake model there would be 4 groups and all the spokes would be the same size but will have different bends for the “inner” and “outer” spoke.

I did a trial fit of the spokes to make sure they fitted the right way in the hub before attaching them to the rim. This is the chain side. Look carefully at the hub, you can see the indents in the alloy hub where the original factory “outer edge” spokes originally ran. Use these indents to get started.
Mounting the hub
You might find it easier to mount the hub on a shaft and secure the shaft into a vice so the hub is horizontal. This gives you easy access to the hub for putting spokes in. If you can’t manage this, then a flat bench will be required and best to put a towel down so the rim is not scratched or damaged on the bench. If mounting on a vice, put the chain side towards the vice. If using a bench then just start with the chain side up and flip it over when all the spokes are installed.
Lacing the Outer Edge (Chain Side First)
Find a hole in the rim where the valve stem pokes through, use the first spoke nipple hole to the Right of it that is pointing to the chain side inner edge. We will make this spoke the first and it is called the “Key” spoke.

I always install the 10 spokes that go on the inner edge first. Note that they are in every second hole on the hub.
When installing the spokes, work in a Clockwise direction from now on. Once you have installed the first “inner” spoke, count the next hole in the RIM as 2, then 3, 4 and finally 5. Place a nipple in 5 and feed a spoke from the hub to it (remember every second hole on the HUB). Screw the spoke in till the last thread can be seen. Rotate the hub as needed so the spoke extends its full length.

I tipped the rim over to show the insertion of the next 10 spokes, these were a little tighter to bend into place. Note the direction change of the spokes from the first 10 installed. I also did a test fit of a few spokes from the disk side to make sure they reached the correct holes and screw into the nipples.
A clean photo showing 2 spokes from the outer edge installed, 10 for the inner edge and a test fit of 2 longer spokes (disk side).
Now looking at the RIM where we just screwed in the, count Holes 2, 3, 4, and stop at 5. Hole 5 is the next spoke hole for the edge we are doing, this hole will become our #1 hole when we count out the next spoke. That means we should have 3 empty holes between each spoke so far.
On the hub there are 20 holes, 10 for the outer edge spokes and 10 for the innner edge spokes. Install the remaining inner edge spokes, then start on the outer edge spokes. Once that’s done, flip the wheel over.

Progress on the spokes that fit on the disk side is moving ahead.
Trial fit the first long spokes, You should be able to see the spoke reach the rim and meet a nipple pointing in the same direction. You can either do them in a clockwise direction first and then do the remaining spokes or do them in pairs.
The photo below shows the counting sequence in case you are stuck. As there are 4 spokes in a group, we count 1 to 4, but when you go to install a spoke of the same edge and type, count 2, 3, 4, then 5 The 5th is the start of the next group so 1 and 5 are used but mean the same spoke. Using our new #1 hole, count 2,3,4, and then 5 and repeat from here till all 10 spokes are in. Just remember that each time we count to 5, #5 becomes our first new hole for the next group.

For the sprocket side outer edge, a spoke is installed in every second hole, on the RIM the spoke feeds into hole #1 and then the next spoke is #1 (#5).
If the hub is loose then every spoke will need to be tighten an equal amount so the Hub is tight.
Truing and adjusting the tension
Truing the wheel allows it to rotate evenly for its entire rotation. Tension means it will support the weight of the bike during its full rotation without buckling.
To achieve this we need to mount the wheel in a stand so we can spin it freely and check it is laced true and correct for both side to side movement while rotating and has equal distance from the centre axle up and down.
You will need to either buy or build a stand to mount the wheel so it can be spun as if it was spinning on the bike. Professionals use cones that push into the holes where the axle spins to support the wheel. A dial gauge is required to get the alignment exact but if you don’t have a dial gauge you can use a rod mounted at rim height to visual spot the rim’s side to side movement.
Assuming you have the wheel mounted, spin the wheel and note the side to side movement. Locate the edge that comes closest to the rod and visually note the edge that is furthermost. Somewhere in the middle is where we want to centre the wheel on. If you use a dial gauge you can re-zero the gauge on this point and then adjust as per below till you are as close to the zero point as possible. As a rule of thumb, within 2mm is considered acceptable for a lot of rims, best to check the service manual for your exact model.
Where the where rolls closest to the rod, tighten the spoke on the opposite side for approximately 4 spokes, that’s 2 before the low point and 2 after the low point, try 1/8th to 1/4 turns only and spin and repeat. You may need to loosen 2 to 4 of the spokes 180 degrees around from the low point if you have reached the tension point of the nipple.
If the widest point has not altered, stop the wheel at that point and tighten the spokes on the side of the rod, again 2 before the wide point and 2 after. Roll the wheel additional times and adjust till the wheel’s side to side movement is reduced to nearly zero.
Now move the rod under the rim so that the gap from the wheels low to high point can be measured.
To tension the spokes, tap each spoke and listen to its note, under tension the spokes should “ring” otherwise they will make a thud noise. You can use a torque wrench and torque all of them to the correct torque but tensioning by ear is a well used method.
When tensioning with a torque wrench, check the service manual to make sure you set the tension to the right setting. Tighten ever 4th spoke so you don’t change the side to side run out.

Hi, very nice work.
I would like to get the same sets of spokes. Where did you get them. Thanks.
I’ve bought most of them from z1enterprises, they get them from Buchanen Spokes I believe. You could try direct if you are in the US but I’m not sure on the pricing.
Good Luck
Sid
I have a 1979 KZ750 Twin. I believe they share the same wheels. Have you laced the front wheel? I have equal numbers of spokes for both wheels. The rear have three different sizes as you mentioned. The front should only use two different sizes but as I mentioned I have three different sizes with an equal number of spokes for both wheels. Any thoughts?
Thanks
I’ve done a few front wheels and there should only be two styles of spokes, one for the inner and one for the outer provided the hub is symetrical. The rear disk style hubs will have minimum 2 but most likely 3 different spoke styles as the hub is NOT symetrical ( disk mount on one side makes that side larger so smaller spokes).
Sid
Hi got a 76 Z900 can’t find torque settings for the front wheel spoke nipples anywhere , any help appreciated. Cheers Jim
Hi Jim,
I was unable to locate a specific torque setting for the z900 (I will ask some fanatics I know if they can check their service manuals), however the z650 manual lists 17-35in lbs so this will be pretty close if not exactly the same as a classic zed.
Sid